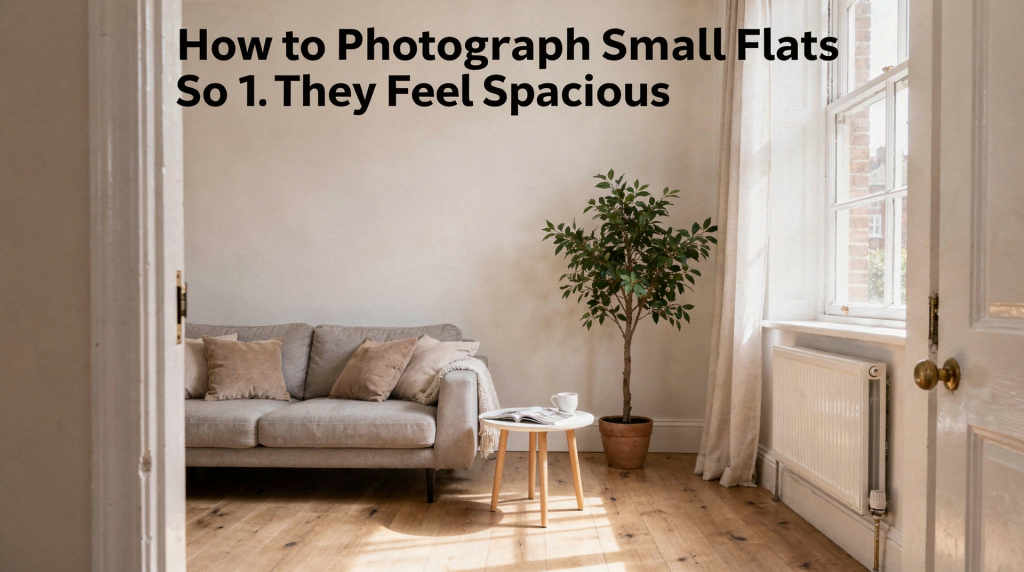
Photographing a compact flat is never straightforward, but with deliberate control over light, angle, and composition, you can make even the tightest apartment feel significantly more open. The goal isn’t to deceive buyers—it’s to reveal the full potential of the space, presenting rooms as airy, usable, and calm. When you get it right, the images do the heavy lifting long before the first viewing.
Why small-flat photography needs a different approach
In compact city flats—whether a converted period property in London or a new-build studio in Manchester—the real challenge isn’t the square footage. It’s how easily a camera can compress an already tight room into something that feels claustrophobic. Harsh angles, dim lighting, visible clutter, and poor shooting positions all conspire to shrink the space visually. I’ve seen beautifully proportioned rooms look like cupboards simply because the photographer stood in the wrong spot or left a laundry basket in frame.
A successful small-space photograph needs to accomplish three things:
- show the room’s layout clearly
- keep proportions believable
- create a genuine sense of depth and flow
When a buyer can instantly grasp how the room functions, the flat feels more spacious—long before they step through the door. That instant understanding is what turns a casual browser into an enquiry.
The core principles that make a small flat feel bigger
1) Show depth, not just width
One of the most common mistakes I see is standing in the middle of the room and shooting straight at the opposite wall. That flattens everything. Instead, use the longest diagonal you can find. Position yourself in one corner and aim toward the opposite corner so the eye travels through the room, picking up layers of space. This simple shift creates depth and suggests the room continues beyond the frame, which is far more convincing than a head-on shot that stops the gaze dead.
2) Let light do the heavy lifting
Bright rooms almost always feel larger than dark ones, and in England—where daylight can be scarce for much of the year—this principle is non-negotiable. Open curtains fully, lift blinds, and if needed, switch on all available lights to balance the exposure. The aim isn’t to make the room look artificially bright; it’s to achieve a clean, even illumination that removes gloomy corners. Buyers equate light with airiness, and airiness with space. A well-lit small flat can easily feel more generous than a poorly lit larger one.
3) Keep proportions believable
Wide-angle lenses are essential for compact interiors, but there’s a fine line between helpful width and obvious distortion. When walls start to curve, furniture stretches, or the room looks unnaturally elongated, you’ve broken trust with the viewer. The best property photos appear generous without looking fake. For most small flats, I recommend using the widest setting only when the room is genuinely tight; otherwise, back off slightly to keep straight lines under control. A believable image always outperforms a dramatic one in the long run.
Best camera settings and lens choices for small flats
There’s no single magic setting, but the table below is the practical starting point I use when shooting compact apartments. It balances the need to capture the full room with the imperative to keep the space looking natural.
| Setting / Choice | Recommended approach | Why it helps |
|---|---|---|
| Lens focal length | Wide-angle, but not extreme | Captures more of the room without making it look unnatural |
| Camera height | Around chest height | Shows floor space and keeps the room feeling grounded |
| Shooting angle | Corner-to-corner diagonal | Adds depth and makes the room feel longer |
| Orientation | Usually landscape | Better for showing layout and flow |
| Perspective | Keep vertical lines straight | Prevents walls from looking warped |
| Exposure | Slightly bright, not blown out | Makes the space feel cleaner and larger |
A useful rule of thumb: if the room starts to look curved, stretched, or “too wide to be true,” you’ve pushed the lens too far. Back off and recompose.
Room-by-room guide: how to make each space feel spacious
Living room
The living room should feel like the most inviting space in the flat, so start by removing anything that blocks the natural path through the room. I always photograph from the farthest corner I can, ideally including a window to anchor the light source. Show the seating arrangement and some open floor area—even a sliver of visible floor between furniture makes the room breathe. Avoid shooting too close to sofas or armchairs; that proximity exaggerates their bulk and eats up visual space. If the room is narrow, don’t force a central composition. Let the length of the room work for you by emphasising the long axis.
Kitchen
Small kitchens are often the hardest to photograph because they can quickly look cramped. The trick is to emphasise order and usable surfaces. Clear countertops as much as possible—leave only a few considered items that suggest functionality. Open a blind or curtain for extra daylight, and shoot toward the length of the kitchen rather than across its narrowest point. Include practical features such as appliances, the sink run, or a breakfast bar, because these tell the buyer how the kitchen works. For galley-style kitchens, one strong image from one end often tells the story better than two awkward close-ups that feel cluttered.
Bedroom
A small bedroom should feel restful, not crowded. The biggest mistake is showing too much furniture too close to the lens, which makes the room feel like a storage unit. Make the bed look simple and tidy—light bedding helps reflect light and adds to the sense of calm. Leave space around the bed, even if it’s minimal; that negative space is what signals “room to move.” Shoot from a corner to show both the bed and the remaining circulation area. If there’s just enough room for the bed and little else, focus on cleanliness and proportion rather than trying to exaggerate size.
Bathroom
Bathrooms are usually the most compact room in the flat, so the aim is clarity, not drama. Use the widest sensible angle to capture as much of the layout as possible. Keep mirrors and glass spotless—smudges catch light and draw attention to the room’s limitations. Close toilet lids, avoid cutting off fixtures awkwardly, and show how the room is arranged. A bathroom that looks bright, clean, and complete will always perform better than one that appears dark or cramped, because buyers want to feel they can use the space immediately.
Hallway and entrance
Hallways often get ignored, but they matter because they create the first impression of flow. A good hallway photo can make a flat feel better planned and more connected. Shoot straight or diagonally depending on the shape; avoid over-dark corners by balancing light. Show where the hallway leads—even a glimpse of the next room helps. Keep coats, shoes, and clutter out of frame. In many flats, the hallway is tiny. The job is to make it feel like part of a coherent home, not just a passageway you rush through.
A simple shooting workflow for compact apartments
Step 1: Declutter aggressively
Small flats need more editing before shooting than larger homes. Every object in frame matters because there’s nowhere for it to hide. Remove anything that makes the room feel busy: extra chairs, laundry baskets, bins, chargers and cables, unnecessary decor, kitchen clutter. If something doesn’t help the buyer understand the room, take it out. I often tell agents to do a “visual audit” before I arrive—it saves time and immediately improves the sense of space.
Step 2: Maximise natural light
Open everything that controls daylight: curtains, blinds, and internal doors where helpful. Then switch on lamps or ceiling lights if they improve balance. The goal is a room that feels open and complete, not overlit. Pay attention to how light falls on walls and floors; even patches of brightness can make a room feel larger.
Step 3: Choose the strongest corner
Walk the room and look for the angle that shows the most depth, the clearest layout, and the least visual noise. In most small flats, the best shot is rarely the one directly in front of the door. Take a moment to assess each corner—the difference between a mediocre image and a great one often comes down to moving a metre to the left or right.
Step 4: Lower the camera slightly
Shooting from a slightly lower-than-eye-level position often helps the room feel more spacious because it shows more floor and less ceiling crowding. Don’t go so low that the image feels distorted; keep it natural. Chest height is usually a safe starting point, but adjust based on the room’s proportions.
Step 5: Keep lines straight
Verticals matter in property photography. Slanted walls and leaning doorframes make rooms feel unstable and amateurish. Use a tripod if possible and level the camera carefully. Even a slight tilt can undermine the sense of solidity you’re trying to create.
Step 6: Review with a buyer’s eye
Ask one question: does this image help someone understand the room at a glance? If the answer is no, reshoot from a better angle or simplify the frame. It’s better to spend an extra five minutes on location than to publish a photo that confuses or misleads.
Common mistakes that make small flats feel smaller
- shooting from the centre of the room
- using an extremely wide lens that distorts everything
- leaving too much clutter in frame
- photographing in low light without balancing exposure
- cutting off furniture or fixtures awkwardly
- showing too little floor space
- ignoring the best natural light in the room
- tilting the camera instead of keeping lines level
One bad photo can make a well-designed compact flat feel cramped. I’ve seen listings where a single poorly composed image undermined an entire set of otherwise decent shots. Consistency in approach is key.
Editing tips that improve spaciousness without misleading buyers
Editing should refine the image, not rebuild the room. Keep it honest. Useful edits include correcting white balance so the flat doesn’t look yellow or cold, lifting shadows gently in dark corners, straightening verticals, and slightly reducing clutter through cropping—not heavy retouching. Balance contrast so walls and floors separate clearly, which enhances the perception of volume.
Avoid over-brightening windows until they turn pure white, warping walls to create fake width, smoothing away all texture, or making the room look larger than it really is. A trustworthy image performs better long term than a dramatic one that disappoints on viewing. Buyers remember when the reality doesn’t match the photos, and that erodes trust in the agent.
Checklist: before you press the shutter
- Are all surfaces clear and tidy?
- Is the room lit as evenly as possible?
- Have you chosen the strongest corner angle?
- Are the vertical lines straight?
- Can the buyer understand the room layout immediately?
- Does the frame show enough floor space to feel open?
- Have you avoided unnecessary distortion?
If three or more answers are no, adjust the setup before taking the photo. This quick mental check has saved me from countless reshoots.
When to use a wide-angle lens — and when not to
A wide-angle lens is usually essential for compact interiors, but it’s not a magic fix. Use it when you need to show the full room or create a sense of openness. Avoid overusing it when the room is already small enough that distortion becomes obvious—the viewer’s eye will catch the unnatural stretch. A good rule of thumb: use wider settings for bathrooms, hallways, and tight kitchens; use a slightly less aggressive angle for bedrooms and living rooms if the room shape is already clear. The best lens choice is the one that shows the room honestly while making it feel comfortable to explore.
How to make a small flat feel valuable, not cramped
The strongest small-flat photography does more than show square footage. It shows potential. Buyers want to understand how they would move through the flat, where furniture would go, whether the space feels liveable, and whether the layout supports daily life. That means your job is to communicate function. A well-shot small flat feels less like a compromise and more like a smart, efficient home. When you highlight flow, light, and usable zones, you shift the narrative from “small” to “well-planned.”
FAQ
What is the best angle for photographing a small flat?
The best angle is usually from a corner shooting diagonally across the room. This creates depth and makes the room feel longer and more open, guiding the eye naturally through the space.
Should I use a wide-angle lens for small apartments?
Yes, but use it carefully. A wide-angle lens helps show the full room, but too much width can distort proportions and make the listing feel unrealistic. Aim for a focal length that captures the space without bending reality.
How do I make a small room look bigger in photos?
Use more light, clear clutter, shoot from a corner, keep the camera level, and show as much usable floor space as possible. These four adjustments work together to expand the visual footprint.
Is it better to shoot small flats in landscape or portrait?
Landscape is usually better for interior property photos because it shows layout and flow more clearly. Portrait can work for detail shots, but for whole-room views, horizontal framing gives a truer sense of space.
What is the biggest mistake in small-flat photography?
The biggest mistake is failing to show depth. Photos taken from the middle of the room, with poor light and clutter, make compact spaces feel even smaller. Without depth, the room reads as a flat, confined box.
Conclusion
Photographing small flats well is about control. Control the light, control the angle, control the clutter, and control the perspective. When you do that, even a compact apartment can feel open, calm, and well planned. The aim isn’t to make the flat look bigger than it is—it’s to make it look as spacious as it truly feels when someone walks through the door. That authenticity is what turns viewers into buyers.