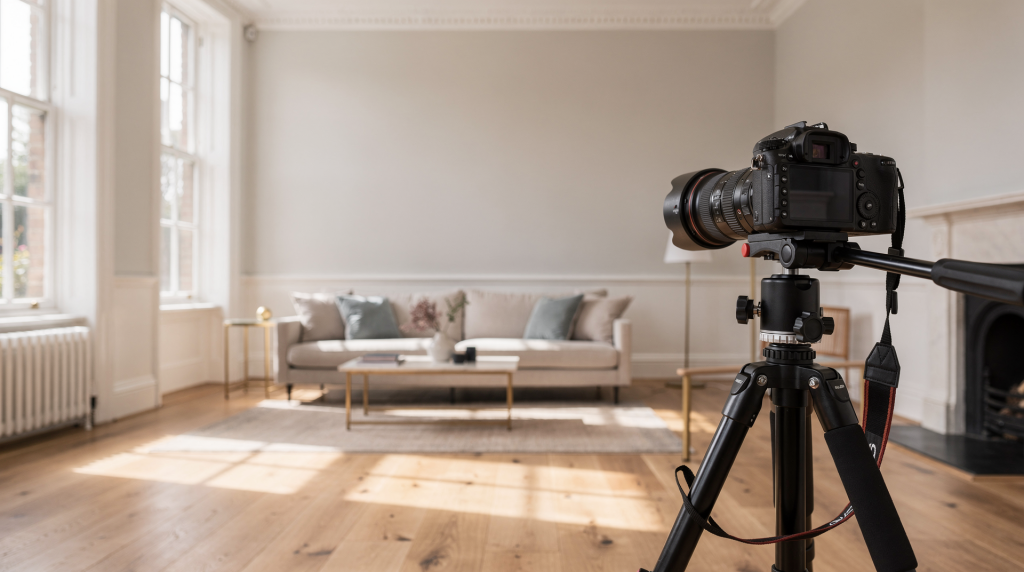
Great interior property photos start with predictable camera settings, not luck. For most homes in England, the best results come from a low ISO, a mid-range aperture, and a tripod-supported shutter speed that you adjust to the light in the room.
Interior photography is about showing space, shape, and light clearly. That means your settings should prioritise sharpness across the whole room, clean files with little noise, and enough dynamic range to hold both window detail and darker corners. When I train agents or shoot for developers, I always say: the camera is just a tool—the settings are where the consistency lives. If you nail the baseline, every room becomes a repeatable process, not a guessing game.
The best starting settings for interior property photography
If you want one reliable baseline, start here. These numbers aren’t pulled from a manual—they’re what I dial in on almost every listing shoot across England, whether it’s a Victorian terrace in Bristol or a new-build flat in Manchester.
| Setting | Recommended starting point | Why it works |
|---|---|---|
| ISO | 100–200 | Keeps noise low and detail clean |
| Aperture | f/8 to f/11 | Keeps more of the room sharp from front to back |
| Shutter speed | Adjust as needed on a tripod | Lets you expose correctly without lifting ISO too much |
| White balance | Daylight, Auto, or custom Kelvin | Helps keep walls, paint, and wood tones natural |
| File type | RAW | Gives more flexibility in editing exposure and colour |
These settings are a strong default for most interior rooms in England, especially when you are shooting for estate agency listings, developer brochures, or premium rental marketing. I’ve seen too many agents rely on auto modes and then wonder why their photos look flat or inconsistent across a property. This baseline eliminates that variability. Once you internalise these numbers, you stop thinking about the camera and start thinking about the room—which is exactly where your attention should be.
Why these settings matter
Interior property photography is different from portraits or street photography. You are not trying to freeze motion or blur the background. You are trying to show the room accurately and evenly, with as little distortion and grain as possible. A buyer scrolling through listings doesn’t consciously notice sharpness or noise—but they do feel whether a space looks inviting and trustworthy. Grainy, soft, or poorly exposed images subtly signal unprofessionalism, and that can cost you a viewing.
Low ISO keeps the image clean
ISO controls how sensitive the camera sensor is to light. In interiors, a high ISO can make walls look gritty, soften texture in flooring, and create ugly noise in shadow areas. That is why ISO 100 or 200 is the safest place to start. I’ve seen agents push ISO to 800 or higher because they were shooting handheld in a dim hallway, and the resulting images looked like they were taken through a fine mesh. That noise doesn’t just look bad—it erodes the perceived quality of the property itself.
If the room is dark, it is usually better to slow the shutter speed on a tripod than to push ISO too high. A tripod gives you the freedom to keep ISO pristine and let the shutter do the heavy lifting. Even in the gloomiest English terrace, I rarely go above ISO 400 if I’m on sticks.
Mid-range aperture keeps the whole room sharp
Aperture affects depth of field. For property photography, you usually want the sofa, back wall, kitchen cabinets, and window line all to stay acceptably sharp. That is why f/8 to f/11 is the most useful range. At f/8, most wide-angle lenses hit their sweet spot—sharp across the frame without diffraction softening the details. At f/11, you gain a bit more depth but might start losing micro-contrast, so I treat f/8 as the default and only push to f/11 when the room is deep or I need front-to-back crispness.
Very wide apertures such as f/2.8 often make only part of the room sharp. That may look attractive in other genres, but it is rarely the right choice for listings. A buyer wants to see the relationship between the kitchen island and the dining area, not a dreamy blur that hides half the floorplan.
Shutter speed is your exposure control
Once ISO stays low and aperture stays in the sharpness zone, shutter speed becomes the main setting you use to brighten or darken the image. Indoors, that often means slower shutter speeds than people expect. I’ve had agents look at my settings and ask, “A quarter of a second? Won’t that blur?” Not if the camera is locked down on a tripod and the room is still. Curtains aren’t moving, furniture isn’t running away—you can afford to let the light soak in.
On a tripod, shutter speed can be fairly slow without causing blur, as long as nothing in the room is moving and the camera itself is stable. This is the single biggest shift in mindset I teach: stop treating shutter speed like a handholding limit and start treating it as an exposure dial.
Recommended settings by room type
Not every interior is lit the same way. A bright south-facing lounge and a narrow hallway need different handling. The baseline stays similar, but the nuance is in how you read the light.
| Room type | Good starting settings | Notes |
|---|---|---|
| Bright living room | ISO 100, f/8, slower shutter as needed | Often easy to expose cleanly |
| Average bedroom | ISO 100–200, f/8 to f/10 | Watch lamps and window highlights |
| Dark hallway | ISO 200, f/8 to f/11, slower shutter | Use tripod stability and check shadows |
| Kitchen with windows | ISO 100, f/8, bracket exposures if needed | Bright worktops and windows can clip easily |
| Bathroom | ISO 100–200, f/8 | Watch reflections and mixed light sources |
Use these as starting points, not rigid rules. The actual shutter speed will depend on how much daylight enters the room, whether artificial lights are on, and whether you are balancing exterior window detail. I always take a test shot and check the histogram before committing to a room. A bright living room might need 1/15s, while a north-facing bedroom could drop to 1/4s or slower. The key is to stay calm, check your highlights, and let the tripod earn its keep.
Manual mode or aperture priority?
Both can work. The better choice depends on how much control you want and how consistent the lighting is across the property. I’ve shot entire portfolios in both modes, and each has its place.
Manual mode
Manual mode is best when you want consistent exposure across a whole property. If you are shooting a full set of listing images, this makes editing easier because the rooms match more closely in brightness and colour. When I hand over files to an agent or a developer’s marketing team, I want them to see a coherent set, not a patchwork of exposures that need individual rescuing.
Use manual mode when:
- You want consistent results from room to room.
- You are working slowly and methodically.
- You are using a tripod and checking the histogram.
Aperture priority
Aperture priority can be useful if you are moving quickly or if the lighting changes a lot from room to room. You lock the aperture at f/8 or f/11, keep ISO low, and let the camera choose the shutter speed. This is handy when you’re shooting a large property with mixed natural and artificial light, and you don’t want to constantly tweak settings.
Use aperture priority when:
- You want speed and convenience.
- You are comfortable correcting small exposure differences later.
- You are working in mixed lighting where conditions shift quickly.
For most estate agency work, manual mode gives more repeatable results. For faster volume shooting, aperture priority is a practical compromise. I tend to use manual for premium listings where every frame matters, and aperture priority for quick turnarounds like rental valuations—but I always keep an eye on the exposure compensation dial to nudge the meter when needed.
White balance: the setting that often gets overlooked
White balance affects how warm or cool the image looks. In property photography, bad white balance is one of the quickest ways to make a room feel unnatural. White walls can turn yellow, grey flooring can look blue, and wood can become overly orange. I’ve seen otherwise well-composed shots ruined by a colour cast that makes the space feel sickly or cold.
Best approach for interiors
- Use a preset such as Daylight when natural light dominates.
- Use Auto if your camera handles mixed light well.
- Use custom Kelvin if you want tighter control and repeatable colour.
If you want the safest workflow, set a consistent white balance and refine it later in editing. That is one reason shooting RAW is so useful. I typically set Kelvin to around 4800–5200K for daylight-led rooms and adjust in post if the ambient light was tricky. The goal is neutrality that flatters the space without misleading the buyer. A warm glow can be inviting, but if it turns a white ceiling beige, you’ve lost the plot.
Tripod use: optional in theory, essential in practice
A tripod is not just helpful for interior photography. It is the difference between controlled property images and noisy, uneven snapshots. I won’t shoot a listing without one—even if the room seems bright enough to handhold. The consistency it brings is worth the extra setup time.
A tripod lets you:
- Keep ISO low.
- Use slower shutter speeds without blur.
- Maintain consistent camera height.
- Align vertical lines more easily.
- Reproduce the same framing for bracketed exposures.
A practical rule in England is to shoot around waist height, often roughly 1.1 m to 1.3 m, depending on the room and the furniture layout. This height usually shows the room naturally without making ceilings feel too low or floors too dominant. I adjust slightly for kitchens—sometimes a touch higher to see worktop surfaces—but waist level is my anchor. It mimics how a buyer might perceive the space when standing in it.
How to expose for windows and interiors
One of the hardest parts of interior photography is the brightness gap between inside spaces and exterior windows. If you expose for the room, the view outside can blow out. If you expose for the window, the room can become too dark. This is where a single exposure often fails, and you need to think in layers.
The practical fix: bracket exposures
Bracketing means taking several shots of the same composition at different exposures. A common approach is 3 to 5 frames around your base exposure, for example -2, 0, and +2 EV. Later, you can blend these in editing to retain both the interior detail and the view through the glass. This isn’t about creating HDR that looks fake—it’s about giving yourself the data to make a natural-looking final image.
This is useful when:
- The room has bright windows.
- The property has strong contrast between inside and outside.
- You want to blend exposures later for a cleaner result.
For many interiors, bracketing gives you a much better final image than trying to force one exposure to do everything. I bracket almost every room with a window, even if I think the light is balanced. It’s insurance: you can always ignore the extra frames, but you can’t recover blown highlights from a single shot.
RAW or JPEG?
For property photography, RAW is usually the better choice. RAW files preserve more image data, which gives you more room to correct white balance, recover highlights, and lift shadows during editing. Interiors are unforgiving—mixed light sources, deep shadows, and bright windows push JPEG compression to its limits. With RAW, you have latitude to fix mistakes and fine-tune the mood without degrading the file.
JPEG can be fine if:
- You need very fast delivery.
- The property is shot in straightforward light.
- Your camera settings and exposure are already highly consistent.
For serious listing work, RAW is safer because interiors often need careful correction after the shoot. I shoot RAW for every property, even quick ones. Storage is cheap; reshooting a listing because the white balance was off isn’t.
A simple room-by-room shooting workflow
Step 1: Set the room up
- Turn on lights that improve the space.
- Open curtains and blinds where it helps.
- Remove distractions from counters, floors, and tables.
Step 2: Mount the camera on a tripod
- Keep the camera steady.
- Set the height around waist level.
- Level the frame so verticals stay straight.
Step 3: Dial in your baseline settings
- ISO 100 or 200.
- Aperture f/8 to f/11.
- White balance set consistently.
- RAW capture enabled.
Step 4: Take a test shot
Check:
- Are the walls clean or noisy?
- Are the windows clipped?
- Is the back of the room too dark?
- Do vertical lines lean?
Step 5: Adjust shutter speed
Change shutter speed first before raising ISO. This is the cleanest way to correct exposure on a tripod.
Step 6: Bracket if needed
If the room contains strong window light, capture a small bracket sequence so you have options later.
Common mistakes to avoid
- Using ISO 800 or higher too early, which adds noise and reduces image quality.
- Shooting wide open at f/2.8, which can leave parts of the room soft.
- Handholding slow interior shots and getting blur.
- Ignoring white balance and ending up with unnatural wall colour.
- Exposing only for the centre of the room and losing window detail.
- Changing too many settings between rooms, which creates inconsistent listing images.
Quick camera settings checklist
Use this before every interior shoot:
- ISO set to 100 or 200.
- Aperture set to f/8 to f/11.
- Camera on tripod.
- White balance set consistently.
- RAW selected.
- Vertical lines checked in-frame.
- Test shot reviewed on histogram, not just the LCD.
- Bracketed shots captured if windows are bright.
Best settings at a glance
| Goal | Best setting choice |
|---|---|
| Cleanest image | Low ISO |
| Sharpest room coverage | f/8 to f/11 |
| Better exposure control | Slow shutter on a tripod |
| Most editing flexibility | RAW |
| Better window retention | Bracketed exposures |
FAQ
What is the best aperture for interior property photography?
The most reliable range is f/8 to f/11 because it keeps most of the room sharp without forcing the lens into its extremes. I default to f/8 for most rooms and only push to f/11 when I need extra depth in a long space like an open-plan living area.
What ISO should I use indoors?
Start at ISO 100 or 200. Raise it only when the shutter speed becomes impractically slow or the room is too dark for your setup. On a tripod, you’ll rarely need to go higher, but if you’re in a windowless bathroom with no natural light, ISO 400 is acceptable—just don’t make it your first move.
Should I use flash for interior property photos?
You can, but many estate agents prefer a natural-looking result with available light and careful exposure. If flash is used, it should support the room rather than dominate it. I occasionally bounce a speedlight off a ceiling to lift shadows in a dark corner, but I avoid direct flash—it flattens texture and creates harsh reflections that make the space feel smaller.
Is aperture priority good for property photography?
Yes, especially for faster workflows. However, manual mode usually gives more consistent results across an entire property shoot. If you use aperture priority, keep an eye on the exposure meter and be ready to dial in compensation when the camera gets fooled by bright windows or dark furniture.
Do I really need a tripod?
Yes. A tripod gives you cleaner files, better sharpness, and far more control over shutter speed and composition. It also forces you to slow down and consider each frame, which almost always leads to better images. I’ve never met a professional property photographer who shoots without one.
Final takeaway
For most interior property photography in England, the best setup is simple: low ISO, aperture around f/8 to f/11, and shutter speed adjusted on a tripod to suit the room’s light. If you get those three settings right, you will already be ahead of most listing photos. The rest—bracketing, white balance refinement, careful composition—builds on that foundation. Start with the baseline, trust the process, and let the room speak for itself.