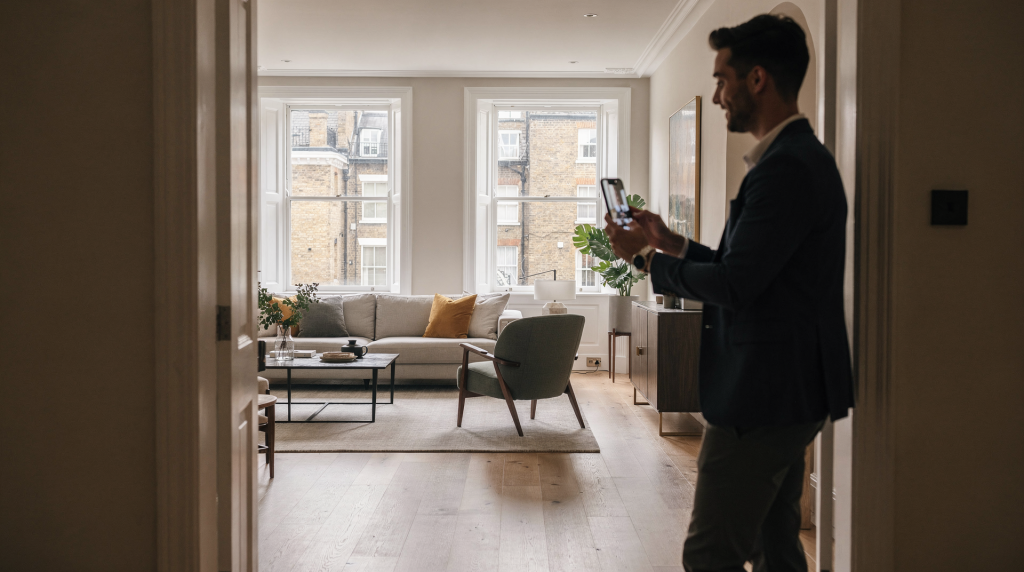
A property walkthrough Reel isn’t just a video of rooms. When it’s done right, it gives viewers an immediate, polished sense of space, natural light, and how the home actually flows — all in a format that feels completely native to Instagram. For estate agents across England, the task is straightforward: take a standard walkthrough and shape it into a Reel that genuinely stops someone mid-scroll and makes them want to know more.
Why property walkthroughs work so well as Reels
Instagram Reels are engineered for quick, vertical storytelling, and that aligns almost perfectly with what property marketing needs. A walkthrough can communicate layout, proportions, and distinctive features in a way that still images simply cannot match — especially when the edit is tight and every second is built around the strongest selling points.
For agents and property marketers, the real currency here is attention. A well-crafted Reel can showcase a property faster than any full-length tour, highlight the emotional triggers that actually drive decisions (not just square footage), and reach people who would never click through to a portal listing. In my experience, Reels consistently generate more saves, shares, and direct enquiries than static posts alone — partly because the format rewards content that holds attention, and partly because a good walkthrough answers the questions buyers actually have before they even ask them.
The critical point is this: don’t upload a raw clip of someone walking from room to room. The best-performing Reels are planned, edited, and structured like a short visual story. That means every shot earns its place, and nothing is left in because it happened to be on the memory card.
Start with the right walkthrough footage
Before you open any editing app, check that your source footage is actually usable. A strong Reel starts with material that’s stable, well-lit, and varied enough to sustain attention across 20 to 40 seconds. If the raw footage is weak, no amount of editing will rescue it.
What to capture during the walkthrough
- the exterior or entrance as an opening shot — this sets context immediately
- the best room first, which is rarely the first room you physically enter
- wide shots that explain layout and movement through the space
- detail shots of finishes, built-in storage, appliances, and any design element that signals quality
- transitional clips: opening a door, moving down a hallway, panning into a room — these create a sense of journey
- one or two lifestyle moments where relevant, such as a garden view, a balcony reveal, or light falling across a dining table
What to avoid
- shaky handheld footage — use a gimbal or at minimum brace your phone with both hands and walk slowly
- long, unbroken shots with no visual change — they drain momentum instantly
- overly dark rooms shot without a practical lighting plan — open blinds, turn on lamps, and if needed, bring a portable LED panel
- filming every room from the same standing-height angle — vary your position to show how spaces connect
- clutter, personal items, or anything that pulls focus from the property itself
If the property is compact, the footage needs to make it feel spacious — that means shooting from corners, using doorways to frame depth, and avoiding wide-angle distortion that warps proportions. If the property is large, the footage should help the viewer understand the flow between rooms so they can mentally walk through it. In both cases, pace matters far more than how much raw footage you captured.
Plan the Reel before you edit
A property Reel lands hardest when it follows a clear structure. Think of it as a mini sales pitch, not a room-by-room archive. Without a plan, you’ll end up with a sequence that feels random — and random doesn’t convert.
A simple structure that works
- Hook
- Best feature
- Supporting rooms
- Lifestyle detail
- Call to action
Example structure for a two-bedroom flat in London
- Hook: “A bright two-bed in Clapham with private balcony”
- Best feature: the open-plan kitchen/living area — show the light, the proportions, the connection between cooking and relaxing
- Supporting rooms: bedrooms, bathroom, any storage that adds practical value
- Lifestyle detail: balcony or neighbourhood view — this is where you sell the feeling of living there
- CTA: “DM for the full brochure or book a viewing”
This structure keeps the viewer oriented and helps the property feel like a complete story. When I edit, I often place the hook and best feature within the first five seconds — that’s the window where you either earn continued attention or lose it to the next post.
How long should a property walkthrough Reel be?
Shorter usually performs better, but the right length depends entirely on the property and how much visual value you genuinely need to deliver. The mistake I see most often is agents trying to cram too much into too little time, or stretching thin content to hit an arbitrary duration.
| Reel length | Best use case | Why it works |
|---|---|---|
| 15–20 seconds | compact flats, simple listings, teaser content | fast, easy to watch, ideal for a first impression that drives curiosity |
| 20–40 seconds | most standard residential walkthroughs | enough time to show layout and key features without losing pace or boring the viewer |
| 40–60 seconds | larger homes, premium properties, more features | useful when the property has several genuine selling points that each deserve a moment |
| 60+ seconds | only when the video still feels tight and engaging | works better for highly distinctive homes or narration-led tours where the story justifies the length |
As a rule, if a shot doesn’t move the story forward — if it’s just another angle of the same thing without adding new information — cut it. Viewers feel the difference immediately, even if they can’t articulate why.
Shoot in the correct format for Instagram
Instagram Reels are designed for vertical viewing, and that means the footage should be planned for a phone screen from the moment you start filming. Trying to crop horizontal footage into a 9:16 frame after the fact almost always leads to awkward framing, cut-off features, or a cramped feel that undermines the property.
Technical basics to aim for
- aspect ratio: 9:16
- resolution: 1080 × 1920 pixels
- frame rate: at least 30 fps — this keeps motion smooth, which matters when you’re panning through rooms
- format: MP4 or MOV
Just as important: keep your key visual elements away from the screen edges. Instagram overlays buttons, captions, and interface elements that can cover text, faces, or critical property features. I’ve seen beautifully shot kitchens where the island was completely obscured by the username and music sticker — easily avoided with a bit of headroom in the frame.
Practical filming tip
When filming a kitchen or living room, leave a little extra space at the top and bottom of the frame. This gives you flexibility later when cropping, adding text overlays, or placing captions. It also means you’re not forced to choose between showing the ceiling height and keeping the floor in shot — both matter for conveying spaciousness.
Editing a walkthrough into a Reel
Editing is where the property starts to feel premium — or where it falls apart. The goal isn’t to show everything you filmed. The goal is to show the right things, in the right order, at the right speed. A clean edit makes the home feel more desirable; a cluttered edit makes it feel like a rushed upload.
Step-by-step editing process
- Pick the strongest opening shot — this is non-negotiable
- Remove dead time and repeated angles — if two clips show essentially the same thing, keep the better one
- Cut on movement to keep energy flowing — a door opening, a pan completing, a step forward
- Use short clips unless a room genuinely needs longer to breathe — most shots can be 1.5 to 3 seconds
- Add text only where it helps understanding — not as decoration
- Add music that suits the tone of the home — more on this below
- Review the video on a phone before posting — what looks fine on a desktop can feel completely different on mobile
Good editing habits
- cut on the beat if music is driving the Reel — this creates a subconscious sense of polish
- alternate wide shots and detail shots — wide establishes space, detail adds texture and quality
- keep transitions simple and clean — a hard cut is almost always better than a flashy effect
- avoid effects that make the listing feel cheap — wipes, spins, and over-stylised filters rarely help property content
- use captions or overlays to label rooms or features when the visual alone isn’t obvious
One thing I’ve learned: the best edits often involve removing shots you’re emotionally attached to. That slow pan across the hallway might have taken effort to film, but if it doesn’t add anything, it’s only slowing the Reel down.
Use text overlays the smart way
Text overlays can be genuinely useful, but only when they add clarity. In property content, text should help the viewer understand what they’re seeing — not cover the video with marketing noise. I see too many Reels where the text competes with the visuals, and the result is that neither lands.
Useful text overlay ideas
- property type and location — grounds the viewer immediately
- number of bedrooms — a key filter for most buyers
- standout feature — the one thing that makes this property different
- price guide, if the strategy suits the brand — use with care, as it can limit enquiries from people who might stretch their budget
- CTA such as “Book a viewing” or “DM for details” — always include this at the end
Example overlay sequence
- “2-bed flat in Islington”
- “South-facing open-plan living space”
- “Private balcony”
- “Allocated parking”
- “Available to view this week”
Keep the wording short. A Reel is not a brochure — it’s a visual invitation. If someone wants the full specification, that’s what the listing link or DM conversation is for.
Choosing music for a property walkthrough
Music sets the emotional tone before the viewer even registers what they’re looking at. A calm luxury home, a family house, and a modern city apartment should not all sound the same — and yet I constantly see agents using the same trending track regardless of the property. That’s a missed opportunity.
Match the audio to the property
- premium homes: soft, elegant, minimal tracks — think piano, ambient textures, nothing that fights for attention
- starter homes: bright, upbeat, clean energy — something that feels optimistic and accessible
- contemporary city apartments: modern, fast-paced sounds — but not aggressive; the energy should match the lifestyle
- family homes: warm, reassuring, lifestyle-friendly audio — acoustic guitar, gentle rhythms, a sense of comfort
Avoid music that feels too aggressive or too trend-driven for the listing. The soundtrack should support the property, not compete with it. And always check the volume balance — if the music drowns out a voiceover or makes the Reel feel like an ad for a nightclub, dial it back.
Add a strong hook in the first seconds
The opening moment decides whether people keep watching or swipe away. Do not begin with a long hallway shot, a logo screen, or a slow fade-in. Open with the best reason to care — the one thing that makes this property worth someone’s attention.
Strong hook examples
- “A Victorian terrace with a surprise garden room”
- “This one-bedroom flat is bigger than it looks”
- “Inside one of the best-value homes in Brighton”
- “A five-minute walk from the station and full of natural light”
The hook should make the viewer curious within the first few seconds. In property marketing, curiosity is often more valuable than polish alone — because curiosity drives the watch time that signals to Instagram that this content is worth showing to more people. A technically perfect Reel with a weak hook will underperform every time against a decent Reel that opens with something genuinely interesting.
Common mistakes when making property Reels
Many property videos fail for the same reasons, and the frustrating part is that the footage itself is often fine. The Reel just doesn’t work as content because of avoidable editing and structural errors.
Typical mistakes to avoid
- starting too slowly — the first two seconds are everything
- showing the least impressive room first — usually the hallway or a small bathroom
- making the Reel too long — if you’re bored editing it, viewers will be bored watching it
- using horizontal footage that gets cropped badly — either shoot vertical or accept that the crop will compromise the shot
- adding too much text — when everything is labelled, nothing stands out
- forgetting a clear CTA — if you don’t tell people what to do next, most won’t do anything
- uploading a raw walkthrough with no edit — this signals low effort and gets low engagement in return
- using a generic caption that says nothing useful — “Lovely property, get in touch” tells the viewer nothing they couldn’t guess
A Reel should feel intentional from the first frame to the last. If it looks like an afterthought — something thrown together between viewings — viewers will treat it like one and scroll straight past.
Best practice workflow for estate agents
If you create walkthrough Reels regularly, a repeatable workflow saves time, reduces decision fatigue, and improves consistency across listings. The agents I work with who get the best results aren’t necessarily the most creative — they’re the most systematic.
Simple weekly workflow
- Film walkthrough footage during the listing visit — capture more than you think you need
- Select one property feature that deserves the Reel — don’t try to say everything
- Cut the clip into a short narrative — follow the hook-to-CTA structure
- Add text and music — keep both aligned with the property’s tone
- Review it on mobile — this catches framing issues and text readability problems
- Write a caption with a clear action — tell people exactly what to do
- Post and track saves, shares, and enquiries — these metrics matter more than likes
A quick pre-publish checklist
- Is the first shot strong enough to stop the scroll?
- Does the Reel show the property’s best feature early?
- Are the clips short and varied?
- Is the video vertical and properly framed?
- Is the text easy to read on a phone?
- Does the ending tell viewers what to do next?
Run through this checklist before every post. It takes thirty seconds and prevents the kind of oversights that make a Reel feel amateur — like text that’s cut off at the edges or a CTA that’s missing entirely.
Caption ideas that support the Reel
A caption should add useful context, not repeat the video frame by frame. The Reel does the visual storytelling; the caption fills in the practical details that help someone decide whether to take action.
What to include in the caption
- location — be specific enough to matter
- property type — flat, terrace, semi, detached
- one or two standout features — the things that make this home different
- viewing details or enquiry prompt — make the next step obvious
- a light CTA — not aggressive, but clear
Example captions
- “A bright two-bedroom apartment in central Brighton with an open-plan layout and private balcony. Message us to arrange a viewing.”
- “This four-bedroom family home in Surrey has excellent light, generous space, and a landscaped garden. Full details on request.”
- “A smart London flat with great storage, modern interiors, and a location that makes commuting easy. Enquire for the brochure.”
Notice that none of these captions try to sell too hard. They inform, they invite, and they make the next step feel natural rather than pressured. That tone tends to convert better in property content, where trust matters more than urgency.
When a walkthrough should become a Reel, not a full tour
Not every property needs a long-form video. Some listings are genuinely better served by short, focused Reels — and knowing when to choose one format over the other is a skill that develops with experience.
A Reel is usually the better choice when:
- the property has one standout feature that can carry the content
- you want quick attention on social media rather than a deep dive
- the listing needs broader reach — Reels are surfaced to non-followers more aggressively than other formats
- the target audience is browsing on mobile, which is almost always
- you want to support an ongoing content calendar with regular, manageable posts
A longer walkthrough or full video tour is better when:
- the property is large or complex and the layout needs more explanation
- the buyer needs more detail before they’ll commit to a viewing
- you’re creating content for a premium or high-consideration listing where depth adds perceived value
- the property has multiple features that each deserve proper screen time
The two formats aren’t in competition — they serve different stages of the buyer’s journey. A Reel often sparks the initial interest; the full tour closes the gap between curiosity and commitment.
Checklist: turning a walkthrough into a strong Instagram Reel
Before filming
- choose the strongest selling feature — this is your anchor
- plan the opening shot — know exactly what the first frame will be
- clear clutter and distractions — even small things like mail on a countertop can pull focus
- check lighting in each room — open blinds, turn on lamps, address dark corners
- decide whether voiceover or text will carry the message — this affects how you film
During filming
- shoot vertically — hold the phone naturally, not sideways
- keep the camera steady — use a gimbal or brace against a wall or doorframe
- vary wide and detail shots — don’t film everything from the same distance
- capture short clips instead of long ones — you can always trim, but you can’t add variety later
- film enough material to edit down — aim for at least twice as much footage as you think you’ll need
During editing
- open with the most compelling shot — no exceptions
- trim aggressively — if a clip doesn’t earn its place, remove it
- keep text short and readable — test on a phone screen
- match music to the property tone — don’t default to whatever is trending
- finish with a clear CTA — tell viewers exactly what to do next
FAQ
How long should a property walkthrough Reel be?
Most effective Reels sit between 15 and 60 seconds, depending on the property and the number of features you genuinely need to show. The sweet spot for standard residential listings is usually 20 to 40 seconds — long enough to tell a story, short enough to hold attention.
Should I use voiceover or text overlays?
Use whichever makes the property easiest to understand. Text overlays work well for fast, clean Reels where the visuals speak for themselves. Voiceover is useful when you want to explain value, location, or layout in a way that text alone can’t convey — but it requires good audio quality and a natural delivery. If the voiceover sounds scripted or rushed, it can undermine the entire Reel.
Can I use the same walkthrough video for other platforms?
Yes. A vertical walkthrough can often be adapted for Stories, TikTok, and short-form listings content, as long as the edit is adjusted for each platform’s style and audience expectations. What works on Instagram may need slight tweaks for TikTok’s faster pace or different text placement.
What is the best first shot for a property Reel?
Use the strongest visual or emotional selling point first. That could be the main living area flooded with light, a standout view, a landscaped garden, or a luxury kitchen. The key is that the shot makes someone think “I want to see more” rather than “I’ve seen this before.”
Do I need professional equipment?
Not always. A modern phone, good natural light, and stable framing can produce excellent results if the edit is sharp and the structure is clear. That said, a gimbal and a small LED panel are relatively inexpensive investments that noticeably improve footage quality — especially in properties with challenging light or tight spaces.
Final thoughts
A strong Instagram Reel from a property walkthrough isn’t just a shortened video — it’s a carefully shaped piece of visual marketing that helps buyers understand the home quickly and remember it afterwards. When you combine clear planning, clean footage, tight editing, and a strong opening, a simple walkthrough becomes one of the most effective pieces of content in your listing strategy.
The agents who get this right aren’t necessarily the ones with the biggest budgets or the most expensive gear. They’re the ones who treat every Reel as a deliberate piece of communication — respecting the viewer’s time, leading with value, and making the next step feel obvious. Do that consistently, and the results will follow.